How to Do Skull Crushers With Perfect Form
Looking to build impressive triceps and increase your pushing strength? Skull crushers (also known as lying triceps extensions) are one of the most effective isolation exercises for targeting the triceps muscles. Despite their intimidating name, when performed correctly, skull crushers are safe and incredibly effective for developing arm strength and size.
In this comprehensive guide, we’ll break down everything you need to know about mastering skull crushers with perfect form. You’ll learn proper technique, common mistakes to avoid, equipment options, and variations to keep your workouts fresh and challenging.
What Are Skull Crushers and What Muscles Do They Target?
Skull crushers primarily target the triceps brachii, the three-headed muscle that runs along the back of your upper arm. This muscle makes up about two-thirds of your arm’s mass, making it crucial for both aesthetic development and functional strength.
The name “skull crusher” comes from the movement pattern – lying on your back and lowering a weight toward your forehead (or “skull”) by bending at the elbows. While the name sounds dangerous, proper form ensures this exercise is both safe and effective.
When performing skull crushers, all three heads of the triceps are engaged:
- The long head (upper inside portion) receives the most activation
- The lateral head (outer visible portion) is heavily engaged
- The medial head (lower inside portion) assists throughout the movement
Additionally, skull crushers engage your core for stability and your shoulder muscles as stabilizers, though they aren’t the primary target.
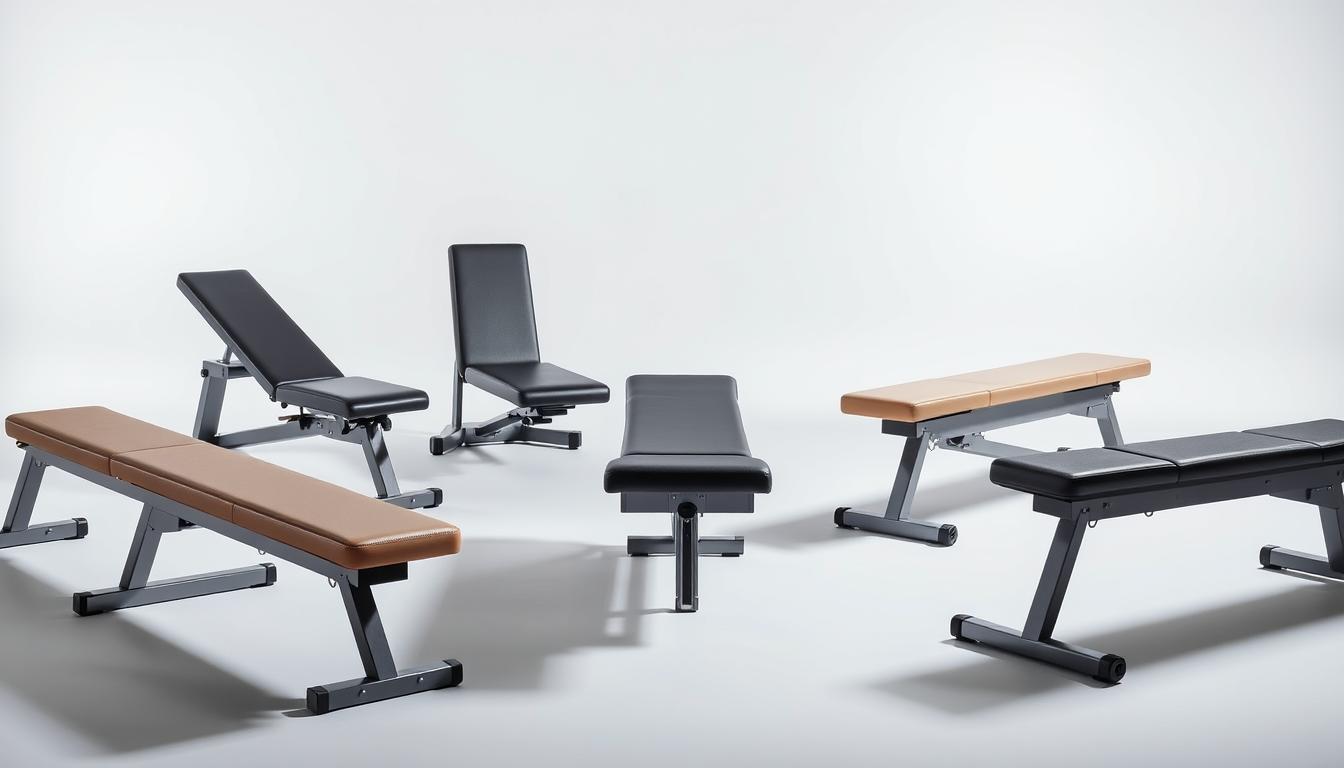
Equipment Options for Skull Crushers
One of the advantages of skull crushers is their versatility when it comes to equipment. You can perform this exercise effectively with several different tools:
| Equipment Type | Advantages | Disadvantages | Best For |
| EZ Bar | Angled grip reduces wrist strain; balanced weight distribution | Less wrist rotation freedom; fixed grip width | Most users, especially beginners |
| Dumbbells | Independent arm movement; greater range of motion | Requires more stabilization; potential for imbalance | Identifying and correcting strength imbalances |
| Straight Barbell | Allows heavier loading; good for strength progression | Can cause wrist discomfort; less natural grip | Advanced lifters focusing on strength |
| Cable Machine | Constant tension throughout movement; reduced joint stress | Requires gym access; more setup time | Maximizing muscle tension and growth |
| Resistance Bands | Portable; joint-friendly; variable resistance | Limited maximum resistance; less stable | Travel workouts; rehabilitation |
For beginners, the EZ bar is often recommended as it provides a comfortable grip that reduces strain on the wrists while maintaining stability throughout the movement.
How to Perform Skull Crushers with Perfect Form

Step-by-Step Instructions
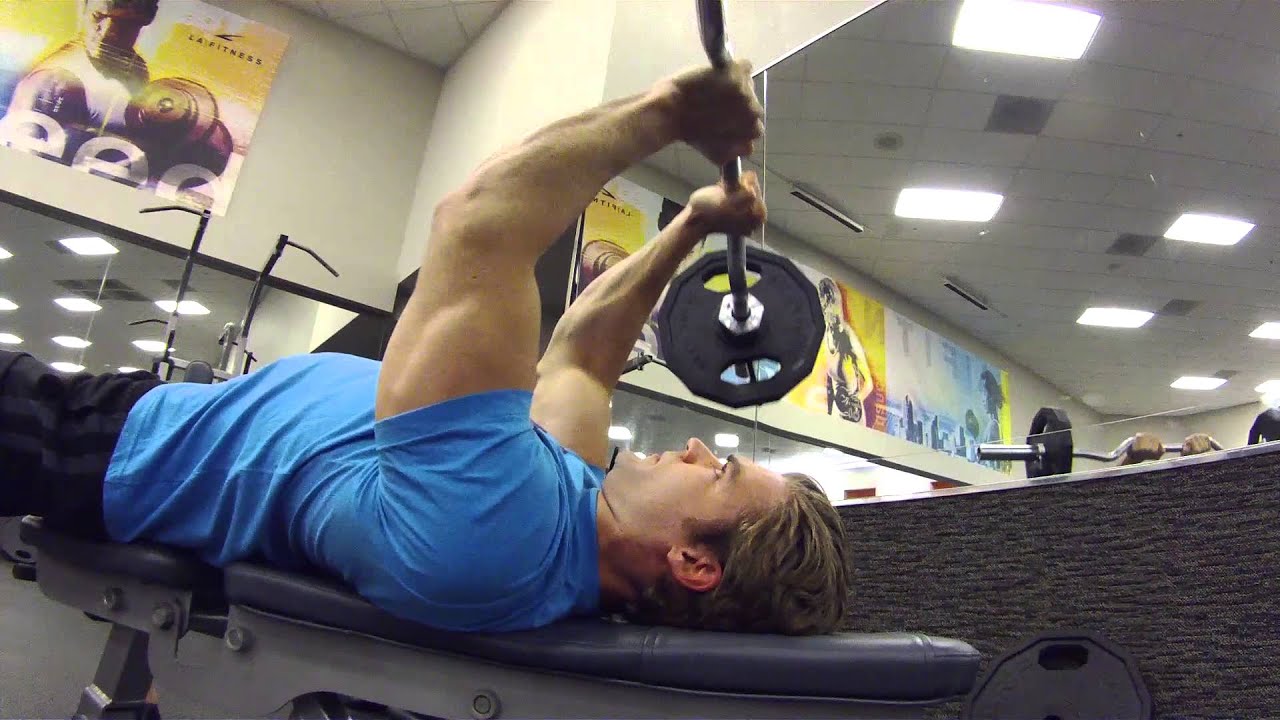
- Setup: Lie flat on a bench with your feet planted firmly on the floor. Your head should be near the end of the bench to allow full range of motion.
- Starting Position: Hold the weight (EZ bar, dumbbells, etc.) with both hands directly above your chest, arms fully extended but not locked. Your palms should be facing away from your face (pronated grip).
- Elbow Position: Position your upper arms at a slight angle (about 91-92 degrees relative to your torso) rather than perfectly perpendicular. This creates constant tension on the triceps.
- Lowering Phase: Keeping your upper arms stationary, slowly bend your elbows to lower the weight toward your forehead. Imagine your elbows as the only hinge in the movement, like pouring water from a pitcher.
- Bottom Position: Lower the weight until it’s about an inch from your forehead. Your elbows should be bent at approximately 90 degrees.
- Lifting Phase: Contract your triceps to extend your elbows and return the weight to the starting position. Maintain control throughout the movement.
- Repetition: Complete your desired number of repetitions while maintaining proper form.
Want to Perfect Your Form?
Get our detailed video tutorial showing proper skull crusher technique from multiple angles. Includes form checks and expert tips!
Download Free TutorialCommon Skull Crusher Mistakes to Avoid

Form Errors That Reduce Effectiveness and Increase Injury Risk
- Flaring Elbows: Allowing your elbows to drift outward reduces triceps engagement and increases shoulder strain. Keep elbows pointed forward and tucked in.
- Moving Upper Arms: Your upper arms should remain stationary throughout the movement. Rocking them back and forth turns this into a different exercise and reduces triceps focus.
- Hyperextending Wrists: Bending your wrists too far back creates unnecessary strain. Maintain a neutral wrist position throughout the movement.
- Arching Back: Lifting your chest or arching your back changes the angle and reduces triceps engagement. Keep your back flat against the bench.
- Using Momentum: Swinging or using momentum to lift the weight reduces muscle activation. Control the weight throughout the entire range of motion.
- Lowering Too Far: Bringing the weight too far back behind your head can strain your shoulders. Lower only until your elbows reach about 90 degrees.
Benefits of Skull Crushers for Strength and Muscle Growth
Benefits of Skull Crushers
- Isolated Triceps Development: Directly targets all three heads of the triceps for maximum growth potential
- Improved Pressing Strength: Stronger triceps translate to better performance in bench press, overhead press, and push-ups
- Better Arm Definition: Developed triceps create that coveted horseshoe shape visible from the side and back
- Joint Stability: Strengthens the muscles around the elbow joint, potentially reducing injury risk
- Versatility: Can be performed with various equipment and modified for different fitness levels
- Functional Carryover: Enhances performance in daily activities requiring arm extension and pushing movements
Research has shown that targeted triceps training can significantly improve overall pushing strength. A study published in the Journal of Strength and Conditioning Research found that subjects who incorporated isolation exercises like skull crushers showed greater improvements in bench press performance compared to those who only performed compound movements.
Ready to Build Bigger, Stronger Arms?
Our 6-Week Arm Building Program combines skull crushers with other proven exercises to maximize triceps and biceps development.
Join the Program3 Effective Skull Crusher Variations
Once you’ve mastered the basic skull crusher, try these variations to target your triceps from different angles and keep your workouts challenging:

1. Incline Skull Crushers
Performed on an incline bench (30-45 degrees), this variation increases the stretch on the long head of the triceps.
- Setup on an incline bench with head at the top
- Hold weight above chest with arms extended
- Lower weight behind head while keeping upper arms stationary
- Focus on feeling the increased stretch in the triceps

2. Close-Grip Skull Crushers
Using a narrower grip (hands 6-8 inches apart) shifts more emphasis to the medial head of the triceps.
- Use an EZ bar or straight bar with hands closer together
- Keep elbows pointed forward throughout the movement
- Lower the weight with control, feeling increased tension in the inner triceps
- Great for developing the “horseshoe” shape of the triceps

3. Single-Arm Dumbbell Skull Crushers
Working one arm at a time helps identify and correct strength imbalances between arms.
- Hold a single dumbbell in one hand above your chest
- Lower the weight with control toward the same-side temple
- Complete all reps on one side before switching
- Allows for greater focus on mind-muscle connection
Safety Tips for Shoulder and Elbow Health
Protecting Your Joints During Skull Crushers
- Start Light: Begin with lighter weights to master form before progressing to heavier loads
- Warm Up Thoroughly: Perform 5-10 minutes of light cardio followed by arm circles and triceps pushdowns before skull crushers
- Use a Spotter: When using heavier weights, have a spotter nearby to assist if needed
- Maintain Neutral Wrists: Keep wrists straight to reduce strain on the joint
- Control the Eccentric: Lower the weight slowly (3-4 seconds) to reduce joint stress and increase muscle tension
- Consider Using an EZ Bar: The angled grip reduces strain on the wrists compared to a straight bar
- Stop If You Feel Pain: Distinguish between muscle fatigue (normal) and joint pain (stop immediately)
If you have a history of elbow or shoulder issues, consult with a healthcare professional before incorporating skull crushers into your routine. You might need to modify the exercise or choose alternative triceps movements that better suit your individual needs.
Recommended Sets and Reps for Different Experience Levels
- Sets: 2-3
- Reps: 12-15
- Weight: Light to moderate (focus on form)
- Tempo: 2 seconds up, 3 seconds down
- Rest: 60-90 seconds between sets
- Frequency: 1-2 times per week
Beginners (0-6 months)
- Sets: 3-4
- Reps: 8-12
- Weight: Moderate (challenging but controllable)
- Tempo: 1-2 seconds up, 2-3 seconds down
- Rest: 90-120 seconds between sets
- Frequency: 2 times per week
Intermediate (6 months-2 years)
- Sets: 4-5
- Reps: 6-10
- Weight: Heavy (challenging for the rep range)
- Tempo: 1 second up, 2-3 seconds down
- Rest: 2-3 minutes between sets
- Frequency: 2-3 times per week
Advanced (2+ years)
For optimal results, incorporate skull crushers into a well-rounded arm or push workout. They work well as a secondary exercise after compound movements like bench press or overhead press, when your triceps are pre-fatigued but not completely exhausted.
Frequently Asked Questions
Are skull crushers bad for your elbows?
When performed with proper form and appropriate weight, skull crushers are not inherently bad for your elbows. However, they do place significant stress on the elbow joint, which can be problematic for those with existing elbow issues.
To minimize risk:
- Use a controlled tempo (especially on the lowering phase)
- Avoid locking out your elbows at the top of the movement
- Choose an appropriate weight that allows for perfect form
- Consider using an EZ bar to reduce wrist and elbow strain
If you experience persistent elbow pain, consider alternative triceps exercises like pushdowns or dips.
Can you do skull crushers without a bench?
Yes, you can perform skull crushers without a bench using these alternatives:
- Floor Skull Crushers: Lie on the floor and perform the movement. This naturally limits your range of motion but is still effective.
- Swiss Ball Skull Crushers: Use a stability ball instead of a bench for an added core challenge.
- Standing Overhead Triceps Extension: A vertical variation that works the same muscles in a standing position.
While a bench provides optimal positioning for full range of motion, these alternatives can be effective when equipment is limited.
How often should I do skull crushers?
For optimal results without overtraining:
- Beginners: 1-2 times per week with at least 48 hours between sessions
- Intermediate: 2 times per week as part of a push or arm workout
- Advanced: 2-3 times per week, potentially varying the equipment or angle
Remember that triceps are also worked during compound pushing exercises like bench press and overhead press, so consider your overall training volume when programming skull crushers.
Master the Skull Crusher for Impressive Triceps Development
Skull crushers are a time-tested exercise that can significantly enhance your triceps development and overall pushing strength when performed correctly. By following the form guidelines, safety tips, and programming recommendations in this guide, you’ll be well on your way to building stronger, more defined arms.
Remember to start with lighter weights to master the form, progress gradually, and listen to your body. Incorporate different variations to keep your workouts fresh and challenge your triceps from multiple angles.
Take Your Arm Training to the Next Level
Get our complete 12-week arm specialization program featuring skull crushers and other proven exercises for maximum triceps and biceps development.
Download Complete Program