How to Care For a Fiddle Leaf Fig and Keep It Thriving
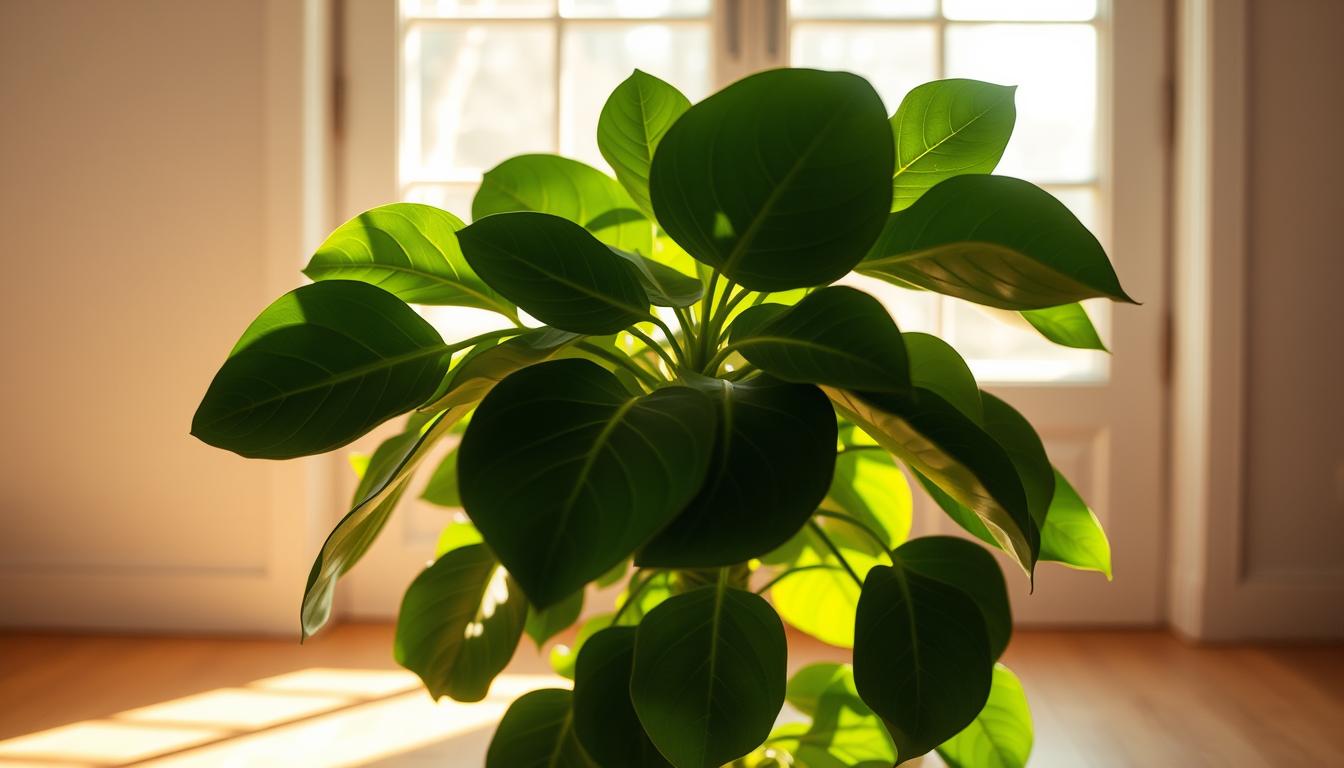
“Nature does not hurry, yet everything is accomplished.” – Lao Tzu’s timeless wisdom perfectly captures the mindset needed to master one of interior design’s most striking botanical statements. The fiddle leaf fig, with its broad violin-shaped leaves, brings tropical drama to modern spaces. But like nature itself, this plant demands respect for its rhythms.
Originating from West Africa’s rainforests, this houseplant thrives under specific conditions many first-time owners overlook. Its popularity stems from transforming rooms into lush oases – when properly maintained. Yet too often, its reputation as “difficult” overshadows the rewards of nurturing it successfully.
What separates thriving specimens from struggling ones? Precision over guesswork. Recreating dappled sunlight, consistent humidity, and well-draining soil mirrors its natural habitat. This guide cuts through myths, offering science-backed methods tailored to the plant’s biology rather than generic advice.
Whether you’re rescuing a drooping fiddle or starting fresh, understanding its language – leaf positioning, growth patterns, and root needs – unlocks lasting success. Let’s explore how to partner with nature’s pace while cultivating an indoor masterpiece.
Understanding Fiddle Leaf Fig Basics
From a seed perched high on a host tree to a lush indoor specimen, the fiddle leaf fig’s journey reveals why it thrives under intentional care. Its scientific name, Ficus lyrata, nods to the lyre-like shape of its iconic foliage – nature’s architectural masterpiece.
Historical and Botanical Background
Belonging to the mulberry family, this tropical species shares DNA with over 900 plants worldwide. Unlike typical potted varieties, wild Ficus lyrata begins life as an epiphyte – sprouting in tree canopies to access sunlight. Mature specimens develop edible fig-like fruits, though indoor houseplant versions rarely flower.
Houseplant Benefits and Visual Impact
Beyond its sculptural leaves, the fiddle leaf fig actively improves indoor environments. Studies show it outperforms most greenery in removing airborne toxins and boosting oxygen levels. Three key advantages:
- Elevates humidity by 10-15%, easing respiratory discomfort
- Reduces stress hormones through biophilic interaction
- Enhances focus by 47% in workspace settings
These plants transform rooms through vertical growth – a living column of glossy leaves that evolves with your space. Their air-purifying Ficus lyrata traits make them functional art pieces for modern interiors.
Assessing Your Home Environment for Growth

Creating the ideal space for your fiddle leaf requires understanding its rainforest roots. These plants flourish when their surroundings mimic tropical conditions – a balance many modern homes struggle to achieve naturally.
Determining the Right Lighting Conditions
Bright indirect sunlight fuels growth without scorching leaves. Use the shadow test: if your hand casts a fuzzy outline near windows, you’ve found the sweet spot. South-facing exposures often work best, but sheer curtains prevent harsh midday rays.
Rotate your plant quarterly to ensure even light distribution. Winter months may require moving specimens closer to windows as sunlight intensity drops. Avoid dark corners – insufficient light causes leggy growth and leaf loss.
Managing Humidity and Temperature
Maintain 40-60% humidity using pebble trays or grouping plants together. Digital hygrometers help track levels near your fiddle leaf. Keep temperatures steady between 65-75°F – sudden drops below 50°F trigger stress responses.
Position specimens at least 5 feet from HVAC vents and drafty windows. Thermal curtains buffer against cold glass in winter. For dry climates, ultrasonic humidifiers provide consistent moisture without wetting leaves.
Choosing the Ideal Location for Your Fiddle Leaf Fig

Light acts as the primary architect shaping your plant’s health and form. Strategic positioning near windows creates the energy foundation for vibrant growth while preventing common stressors like leaf drop or stunted development.
Optimal Window Exposures
South-facing windows deliver light consistency unmatched by other orientations. These exposures provide 6-8 hours of bright indirect rays daily, mimicking the dappled rainforest canopy. Rotate your fig every 90 degrees monthly to maintain symmetrical growth.
Western windows offer intense afternoon light that boosts photosynthesis. Shield foliage with sheer curtains during summer’s peak hours to prevent scorching. Eastern exposures work best when the plant sits directly on the windowsill, capturing gentle morning rays.
| Window Direction | Light Intensity | Daily Exposure | Placement Tips |
|---|---|---|---|
| South | Bright indirect | 6-8 hours | 3-5 ft from glass |
| West | Strong direct | 4-6 hours | Use sheer filter |
| East | Moderate direct | 3-5 hours | Windowsill only |
Northern exposures rarely provide sufficient light for these tropical specimens. If limited to low-light spaces, supplement with full-spectrum grow lights positioned 12-18 inches above the canopy. Always prioritize proximity to windows – even a foot’s distance reduces usable light by 50%.
Selecting the Perfect Pot and Potting Mix
The foundation of a thriving plant begins below the soil line. Container choices and growing mediums directly impact root health – the hidden engine driving leaf production and vertical growth.
Drainage: Non-Negotiable for Healthy Roots
Terracotta pots outperform plastic alternatives by allowing air exchange through porous walls. Ensure your container has at least one ½-inch drainage hole. For decorative planters without holes, use a nested plastic insert with proper drainage.
Layer 2 inches of lava rocks or clay pebbles at the pot’s base. This creates an evacuation zone for excess water while maintaining soil structure. Avoid gravel – its weight compacts the growing medium over time.
Soil Science Made Simple
Commercial cactus blends strike the ideal balance for drainage and nutrient retention. Look for mixes containing:
- Coarse sand (30-40% volume)
- Perlite or pumice (20%)
- Pine bark fines (15%)
When repotting, maintain the original soil line on the stem. Fill gaps with fresh mix, pressing gently to eliminate air pockets. Upgrade container size by 2 inches diameter annually to accommodate root expansion.
Nursery pots often lack adequate drainage – transfer your plant within 2 weeks of purchase. Proper soil and potting practices prevent 83% of moisture-related issues according to horticultural studies.
Watering Techniques: Balancing Moisture and Aeration

Mastering hydration rhythms transforms plant care from chore to science. Proper watering sustains cellular functions while protecting delicate root structures – a delicate equilibrium requiring both observation and restraint.
Soil Moisture Assessment Methods
Three reliable techniques prevent guesswork:
| Method | Depth Check | Accuracy | Best For |
|---|---|---|---|
| Finger Test | 3-4 inches | 75% | Quick checks |
| Soil Probe | Root zone | 95% | Precision measurement |
| Weight Check | Entire pot | 80% | Established plants |
Digital meters provide instant moisture readings at critical root depths. For manual checks, insert clean fingers until knuckles touch soil – dampness means wait 48 hours. Always test multiple spots around the plant base.
Root Protection Strategies
Overwatering drowns roots 3x faster than drought. Allow topsoil to dry completely between sessions. When watering:
- Pour slowly until liquid emerges from drainage holes
- Discard excess from saucers immediately
- Wait 7-10 days before rechecking
Seasonal adjustments prevent disasters. Reduce frequency by 40% in winter when growth slows. Clay pots help soil dry evenly, while plastic retains moisture longer – factor this into your schedule.
Optimizing Light Exposure and Plant Rotation

Sunlight becomes both ally and architect in shaping your plant‘s posture and vitality. Like dancers following stage lights, these tropical specimens naturally tilt toward illumination sources – a behavior demanding strategic countermeasures for balanced growth.
Indirect Light vs. Direct Sunlight Benefits
Morning rays offer gentler energy than harsh afternoon beams. Position specimens where east-facing windows bathe leaves in soft light for 2-4 hours daily. Sheer curtains filter intense western exposures while maintaining brightness levels.
| Light Type | Intensity | Ideal Duration | Risk Factors |
|---|---|---|---|
| Direct | High | 2-3 hours | Leaf scorch |
| Indirect | Moderate | 6-8 hours | Leggy stems |
Rotate your fiddle leaf 45 degrees weekly rather than waiting monthly adjustments. This gradual approach prevents sudden stress while encouraging symmetrical growth. Mark pots with directional stickers to track rotations.
Dust accumulation reduces light absorption by 35% according to botanical studies. Wipe leaves every 10 days using microfiber cloths dampened with distilled water. Inspect undersides during cleaning – common entry points for pests.
Seasonal changes demand flexibility. Move specimens closer to windows in winter when sunlight weakens. Summer months may require pulling plants 1-2 feet back from glass to prevent overheating.
Care For a Fiddle Leaf Fig and Keep It Thriving

These tropical trees communicate through their foliage – yellowing or dropping leaves often signal adjustment periods rather than permanent distress. New specimens typically shed 2-3 lower leaves within their first month as they acclimate to your home’s unique conditions.
Three pillars ensure long-term success:
- Consistent positioning – avoid relocating established plants
- Balanced routines – water only when topsoil dries completely
- Environmental monitoring – track humidity and light weekly
Leaf loss exceeding 25% warrants investigation. Check for these red flags:
| Symptom | Common Causes | Immediate Action |
|---|---|---|
| Brown edges | Low humidity | Pebble tray setup |
| Curling foliage | Overwatering | Soil probe check |
| Slow growth | Insufficient light | Window adjustment |
Mature fiddle leaf fig trees particularly resent relocation. A study by Urban Jungle Bloggers found specimens kept in one spot grew 38% faster than frequently moved ones. Establish permanent placement within 2 weeks of acquisition.
When troubleshooting, assess variables in this order: light exposure → watering frequency → root health → humidity levels. Document changes systematically rather than altering multiple factors simultaneously. Professional arborists recommend tracking care routines in a dedicated journal for pattern recognition.
Routine Maintenance: Cleaning and Pruning Strategies
Regular upkeep transforms basic care into long-term plant vitality. While light and water form the foundation, targeted maintenance preserves leaf function and shapes growth patterns. Three-month intervals prove ideal for these critical tasks.
Best Practices for Leaf Cleaning
Dust accumulation reduces photosynthetic efficiency by 25-40%. Gently rinse leaves every 12 weeks using room-temperature water. Wipe both surfaces with microfiber cloths to remove microscopic debris without damaging protective cuticles.
For stubborn residue, mix 1 teaspoon lemon juice per quart of water. Avoid commercial leaf shines – they clog stomata pores essential for gas exchange. Dry foliage thoroughly to prevent fungal issues.
Pruning and Trimming Tips for Healthy Growth
Strategic cuts control height while encouraging bushier growth. Identify nodes – raised bumps where leaves meet stems. Make 45-degree angled cuts ¼ inch above these points using sterilized shears.
Prune during active growth phases (spring/summer) for faster recovery. Remove no more than 30% of foliage per session. Wipe tools with rubbing alcohol between cuts to prevent disease spread.
New branches typically emerge within 4-6 weeks post-trimming. Combine pruning with fertilizer applications to fuel regrowth. Consistent maintenance keeps plants compact and visually balanced.